Making a Stained-Glass Window
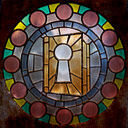
What will we be doing today?
This tutorial explains how to make simple stained-glass window textures from scratch, using materials you may have around the home. The process in brief is:
- Build up a basic glass layer covering the entire texture;
- Place a metal framework over the top of the glass;
- Apply decorative effects to the glass to make it fit into the frame;
- Tint the glass in suitable patterns;
- Tweak the hell out of the resulting texture.
The resulting texture is intended to be opaque and used for solid map geometry; you can leave out certain layers to make it translucent instead, but in that case you may as well make a proper 3D model of it too.
Before we begin, it's good to have either a reference photograph of a stained-glass window you want to replicate, or a sketch of a new pattern you'd like to create. This technique works best for simple patterns; for fancy figurative scenes or landscapes in stained glass, you're better off preserving your sanity and painting it by hand or adapting a reference photograph into a texture instead.
This tutorial is not a step-by-step walkthrough of how to use your graphics software: it assumes you are already familiar with your paint package of choice and are used to using layers, blend-modes and in particular layer masks.
There are some references to Photoshop-specific features, but I have clarified what these do and what alternatives you can use for them in any reasonable graphics package (such as Paint Shop Pro or GIMP).
I. Build up a basic glass layer
Our window will start off as a layer of flat glass covering the entire texture: this makes it easier to apply lighting and texture to the glass as a whole.
First, decide what's outside the window.
We'll be building up our window in layers, and the first layer is what's outside the window. Not much of this will show through (stained-glass windows are meant to be opaque after all), but it will still make a significant difference to the end result.
So, start with a general cityscape or landscape scene:

Then, blur it to diminish details and imitate the distorting effect the stained-glass window will have:

Then, add another colour layer over the top to tint it to the prevailing light. In Photoshop I find the Color blend mode with 25%-50% opacity works well: in this case, dark blue at 25%.

Next, Make the window nice and grimy.
Stained-glass windows in texture-artist-land aren't uniform; they're mottled, they get covered in dust and soot, they get scratched. These little details add interest to the texture and help it feel realistic (even though, in real life, none of these details would be perceptible at a glance).
So, I'm going to take a scratchy, dirty texture and place it as a new layer over the top:
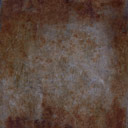
Then, set that layer to a suitable blend mode so that it applies its grittiness to the underlying background without concealing the details of the background itself. Which blend-mode is suitable depends on your paint package and texture; in Photoshop, Overlay, Color Dodge or Color Burn are usually the best for texture detail. This time I've used Color Dodge (with 100% opacity) because it preserved the light areas of the outside view:
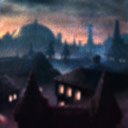
We could leave it at that, but I want to make this window extra-grimy, so I'll put on a layer of greasy soot on top. First I'll duplicate my original grime layer, set it back to a normal blend mode, and blur it heavily:

Then, use a vertical motion-blur effect to make it streaky:
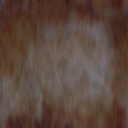
Then finally, set the layer to 50% opacity so that it muddies and discolours the background:
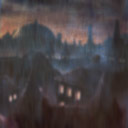
At this point I realised the soot had washed out the blue tint I'd put on earlier, so I increased the opacity of that blue tint layer up to 33%. This is the nice thing about building up textures in layers: you can always go back and adjust/turn off previous things you've done.
II. Creating the metal framework
Stained-glass windows are built out of tiny panes of glass fitted into a lead or copper frame. As such, it's the frame that defines the image, so this is the most important step and where your artistic skills come into play. Time to fish out that sketch of yours.
First, let's shape the frame.
We will make the frame as a kind of stencil: cutting pieces out of a sheet of metal to show the window behind, and adding pieces back in to show the bars. We'll start by adding a metal layer...remember this guy?

I then add a mask to this layer, which allows me to control which bits of the metal show and which are hidden. I use the marquee tools to erase a large area on the mask that represents where my window is going to go:
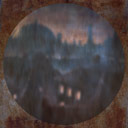
Now, I can put back in the bits of metal I want (the frame) by drawing onto the mask using the standard paint tools. (It will make it easier to see what you're doing if you place a temporary layer of black behind the metal.)

The marquee tools combined with flood-fill are good for blocking in geometric shapes. Then for the detailed bits, you can paint with a precise fixed-width brush at 100% flow and opacity, so the width is consistent and the edges are as sharp as possible. Make the bars wider than they would be in real life: this will help them show up better when you scale your texture down, and make it easier to add decoration to the frame.
Photoshop Korner
For this entire step I actually prefer to work with Photoshop's vector masks: I draw boxes, circles and other shapes for the bars and then manipulate them as vectors. This gives sharper lines, and also lets me tweak curves and move bits around easily.
Anyway, here's what I came up with (and with the window behind it):
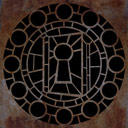
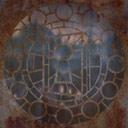
Don't worry too much about the design looking busy: when we add the stained-glass colours, these will define the shapes clearly. Just make sure that you haven't left any parts of the frame "hanging", and that there are struts to break up the larger panes of glass (especially at concave corners, where the glass would otherwise be under stress).
Now, let's make the frame look good.
In real life, the frames on a stained-glass window are black, usually flush with the glass itself, and don't tend to catch the light. This isn't real life though, so we're going to make them more prominent and interesting.
But first, as you can see my frame is clearly far too light. Let's make it darker by decreasing the brightness and increasing the contrast of the metal texture:
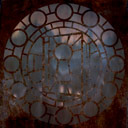
Now on to the real work. Let's apply a bevel to make the frame stand out:
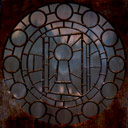
A good bevel is sharp, with its brightest/darkest points inside the bevel rather than at the edges. You can achieve this by creating a new layer, taking a soft brush, and painting white bands through the center of the frames at the places where the light would hit. Then erase the bottom half of the white with a sharp eraser so you are left with a soft highlight that stops sharply at the center of the frame. To make the shadow, just do the same (in black and upside down) on a separate layer.
Use blend modes for the highlight and shadow layers which preserve the detail of the underlying texture: like Overlay, Color Dodge or Color Burn in Photoshop. Play with the opacities until you get a convincing effect that is not too prominent.
Photoshop Korner
For the bevel in the example above, I actually used Photoshop's Bevel and Emboss layer effect to save time. I used the following settings for it:
- Technique: Chisel Hard
- Depth: 100%
- Size: 6px
- Angle 90° and Altitude 30°
- Highlight: White Color Dodge at 50%
- Shadow: Black Color Burn at 25%
- Contour: 10% (this is vital for a sharp bevel)
I also applied a black inner glow, which makes the bevel appear more concave by darkening the edge of the highlight. It used the following settings:
- Blend mode: Overlay
- Opacity: 33%
- Colour: Black
- Size: 5px
III. Make the glass fit into the frame
Looking at the previous example, you'll see that our frame looks like it's empty: the background looks like it's just a distant view through the frame, rather than there being intervening glass. So we need to work on the glass panes to make them fit into the frame.
First things first: frost the glass.
If you look at stained-glass windows (and most kinds of semiopaque window), you'll notice that the panes appear to have a frosted 'halo' of light around the edges. Kinda like this:
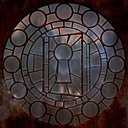
Now that's more like it. You can achieve this by creating a new layer underneath your metal frame, taking a thick fuzzy brush, and painting in white where the frame goes. Then, set the layer to a blend-mode like Overlay so it tints the background without looking over-the-top (50%-75% opacity usually looks good).
Photoshop Korner
For the glow in the example I again cheated by using Photoshop's Outer Glow layer effect on the frame layer.
I used the following settings:
- Blend mode: Overlay
- Opacity: 75%
- Noise: 15%
- Size: 7px
I gave it some noise because this accentuates the surface detail of the window - you may need to exaggerate this more so that it shows up when the texture is scaled down.
Next, give the frame a shadow.
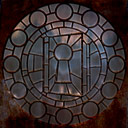
It may strike you as illogical and unnecessary for the frame to cast a shadow against the windowpanes, but it does help the look of the thing. The easiest way to do the shadow is just to copy the frame (mask and all), fill it with black to get rid of the metal texture, slip it underneath the original frame layer and then bump it down several pixels. Set the opacity to something appropriate: 33% should be sufficient. It should look something like this:
Photoshop Korner
You can of course use Photoshop's Drop Shadow layer effect for this, but I actually prefer not to - this gives a crisper, more natural-looking shadow.
IV. Tint the window in pretty colours
We now have something that looks like a believable window. Time to start staining that glass.
Start by creating several layers underneath the frame (one for each colour) and set them to a blend mode that changes the colour of underlying layers while preserving details - Soft Light in Photoshop is a good one.
Now, go through your new layers one by one: pick a colour you want for it, then marquee-and-flood-fill the panes you want to be in that colour. Keep each separate colour on a different layer, so you can easily play with their opacities and blend modes.
Here's what I came up with:
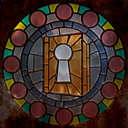
Most of the colour layers use the Overlay or Soft Light blend mode at 100% opacity. The blue and red were too strong though, so I set them to use Multiply and lowered their opacity to 50%.
V. Tweak it to pieces
At this stage we have a release-worthy texture, but there's a few more things we could do to it if we wanted. Because we've mostly been dealing with the image as a whole, now would be a good time to compensate by paying attention to little individual touches. This could include:
Adding a localised glow.
It can sometimes be effective to make the window look as if there's a localised lightsource shining through it - such as sunlight or a nearby streetlight. We can do this by creating a new layer behind the frame and the colour layers, and filling it with a radial gradient from the top or top-center of the window, like so:
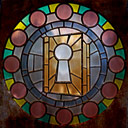
This uses the Overlay blend mode at 75% opacity to preserve the background details.
You may deem this step unsuitable, since it "bakes in" the lighting and you can achieve similar results in-engine just by placing a lightsource in front of the window.
Adding more highlights to the frame and windowpanes.
I'll compensate for cheating with the bevel and glow, by adding some painted white shine on an Overlay layer where the metal and glass catch the light.
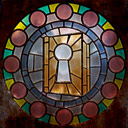
Adding contrasting textures to certain panes.
Not all glass is created equal, and stained-glass windows often incorporate different grains of glass for artistic effect. Here I've cut out little snippets of other textures and put them in on certain panes, the same way I did the scratches and soot layers.
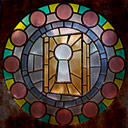
It didn't turn out very noticeable here—I should have used a more distinctive texture—but it still helped to break up the homogenity of the glass.
Adding unnevenness to the frame.
In real life, no frame is smooth and mathematically perfect. If you want to go to some trouble, you can take a fine sharp eraser to the edges of the frame mask and make the outline a little uneven: concentrate first on areas where your eye is drawn to the regularity, like circles and horizontal and vertical lines. The result will be subtle but it will give the texture more verisimilitude.

Photoshop Korner
If you're a cheat and are using the bevel and glow effects, this will also have the benefit of making those effects more excitingly irregular.
If you built up the mask using vectors instead of painting, then you can add a separate layer mask and erase bits from that: this will combine with the vector mask.
Closing statements
Your texture is now hopefully ready for use... you'll probably need to play around with contrast and colour balance, and tweak the colours and the lighting effects to make sure it looks right in-game, but I leave that in your trustworthy hands. I got pretty lucky with this tutorial example, because the background scene and the metal I used both combined to give good colour and contrast results without much balancing needing to be done. In addition, the metal was naturally lit from the center which aided the appearance of light flooding through the window; with your own textures, you may want to make the corners of the frame darker to replicate this.
If you're working with more elaborate engines (rather than in the stone-age, like me) you'll observe that several of the techniques I've used replicate effects that would normally be handled by specular or normal maps. In the case of normal maps, the bevel can instead be remodelled in a 3D package once you have the outline. For specular maps, you can omit the backlighting and added shine; instead, paint a specular map with a light mottling where the glass panes go, perhaps also with sharp highlights along the tip of the frame's bevel.
If you have Photoshop and would like to see/exploit the source version of the example texture, click here to download it (2.9MB). This is covered by the same terms of use as my other textures.